Tools & supplies

What to buy, and whom to trust

When you are just getting started it is really hard to find the right equipment. There are so many tools out there and most of them are expensive. I have been there: I bought tools I barely used and cut corners on cheap kit, only to spend more in the end. Learn from my mistakes and get it right, straight away.

Forging silver at the Estona bench
Honest adviceIncluding what you can happily skip
How I recommend

My honest approach to spending

A small, well chosen kit will take you further than a drawer full of gadgets. Here is the thinking behind every recommendation on this page.

Buy once, buy well

For the few tools you reach for every session, quality pays for itself. I say clearly which ones deserve the spend.

Modify, do not overspend

Plenty of expensive kit can be replaced with a cheaper tool or a simple modification. I show you those workarounds in the tutorials.

What to skip

Just as important as what to buy. If something is not worth it for a beginner, I will tell you to save your money.

The starter kit

Everything you need to make your first piece

This is the short list that gets you cutting, filing and soldering real metal. Nothing here is optional, but none of it needs to be top of the range on day one.

Cutting & holding

Where every piece begins: a clean cut and a steady hold.

  • Jeweller's saw frame EssentialAn adjustable frame lets you use up broken blades instead of binning them. This is the one tool worth buying well.Choose in the tutorials
  • Saw blades, assorted gradesBuy a range from coarse to fine and expect to snap a few while you learn. That is normal, not a sign to spend more.
  • Bench pin & a small viceThe bench pin supports your work for sawing and filing. A modest vice is plenty to start.

Filing & shaping

The slow, satisfying work of turning a rough shape into a finished one.

  • Hand files: flat & half round EssentialA flat file and a half round cover almost everything a beginner needs to shape and true up an edge.
  • Needle file setFor the fine, tight spots the big files cannot reach. A basic set is more than enough at first.
  • Ring mandrel & rawhide malletForm and true up rings without marking the metal. The rawhide mallet shapes without leaving dents.
🔥

Soldering

The step most people fear and the one I most love to teach.

  • A soldering torch EssentialA simple, refillable torch will solder rings, chains and settings. You do not need a professional gas setup to begin.See my torch tips in the tutorials
  • Solder & fluxMatch your solder to your metal and keep hard, medium and easy grades so you can build up a piece without earlier joins flowing.
  • Soldering block & pickleA heat proof surface to work on and a pickle bath to clean off oxides and flux after soldering.
Going further

Add these as your skills grow, not before

Once the basics feel comfortable, these open up casting, stone setting and a professional finish. Wait until a project actually needs them.

Casting & wax

Turn an idea into metal, straight from your own model.

  • Delft clay & sand casting kit LaterAn approachable way to cast at home without a big furnace. A lovely first step into casting.
  • Carving wax & wax toolsCarve a model by hand, then have it cast. Cheap wax and a few shaped tools go a long way.

Stone setting

The moment a piece truly comes alive.

  • Basic gravers & burs LaterStart with a small selection for the setting styles you actually want to make, rather than a full boxed set.
  • Bur life & a loupeKeep burs cutting cleanly and check your work up close. Small spend, big difference to your results.

Power at the bench

The upgrades that speed up work you already do by hand.

  • Flex shaft or rotary tool LaterDrilling, grinding and polishing get much faster. A well loved upgrade, but not a day one purchase.
  • Rolling mill, when readyMake your own sheet and wire. A real investment, so wait until you know you will use it.
Finishing & engraving

For that final professional touch

Finishing is where a handmade piece starts to look truly handmade in the best sense. These are the tools I reach for at the very end.

Polishing

From a first hand shine to a full mirror finish.

  • Sandpapers, fine to very fineWork through the grits before you ever touch a polishing motor. Cheap, and it does most of the work.
  • Polishing motor & mopsFor a fast, even shine. Keep separate mops for each compound so you do not contaminate your finishes.
  • Satin & matte brushesNot everything should be shiny. Brushes give a soft, contemporary finish I use often.

Hand engraving

Where Estona began, and still one of my favourite steps.

  • Gravers for hand engravingA few good gravers, kept sharp, will personalise a piece with lines you cannot get any other way.Learn to sharpen them in the tutorials
  • Sharpening stonesA blunt graver fights you every stroke. Keeping an edge is half of engraving well.
📷

Photographing your work

Covered in depth in the Pure Platinum tier.

  • A simple light box or daylight setupGood, honest light matters more than an expensive camera. A window and a diffuser can be plenty.
  • A phone tripodSharp, steady photos of small pieces. Your phone is already good enough to sell with.Full photo lessons in the membership
Materials & metal

The metals and stones I use in the studio

The raw materials behind every Estona piece. Buy small quantities while you practise, then scale up once your offcuts stop piling up.

Metal

Where every piece of jewelry actually starts.

  • Sterling silver sheet & wire Start hereThe most forgiving metal to learn on and beautiful in its own right. Buy a little sheet and a little wire to begin.
  • 14K gold for special piecesFor the pieces that deserve it. I keep gold for later projects, once the technique is already dialled in.
  • Pure gold grains for star settingA small treat that makes star and gypsy settings glow. A little goes a long way.

Stones

Hand picked, with help from people I trust.

  • Gemstones from my gemmologistI work with a trusted gemmologist rather than chasing the cheapest stone. Honest sourcing shows in the final piece.Ask me who I trust
  • Practice cabochonsSet inexpensive cabochons while you learn, so a slip costs pennies and not a precious stone.

Safety first

The unglamorous kit that keeps you at the bench for years.

  • Safety glasses EssentialNon negotiable the moment you saw, solder or polish. Your eyes are worth far more than the tools.
  • Ventilation & a dust maskSolder, pickle and polishing all put things in the air you should not breathe. Work with good airflow.
  • A fire safe workspaceKeep a heat proof surface and something to smother a flame within reach before you ever light the torch.
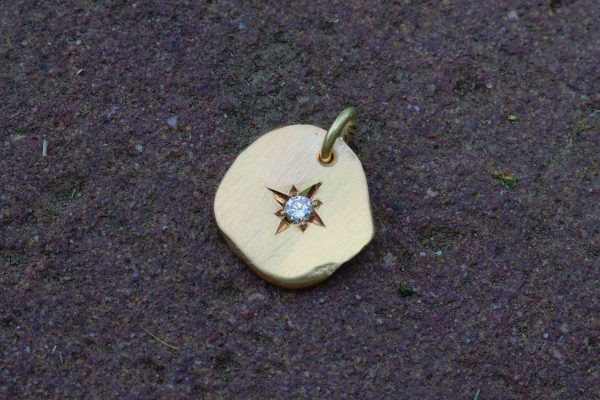
A finished star set diamond piece by Estona
Not sure what to buy?

Ask before you spend

Every studio and every budget is different. Rather than send you off with a generic shopping list, I would far rather talk it through and help you avoid buying tools you will never use.

Book a one on one video call and I will give you personal, honest advice on exactly what you need for the work you want to make, and what you can leave on the shelf for now.